Wednesday, December 22, 2010

Multi-Williams CP, continued

I made more progress on my CP today. It took me about 30 minutes to grind down the shoulders of my leaf buttons so they'd fit. I used this Dremel bit:
I wanted to be able to screw leaf switches into wood, so I riffed on a fellow KLOVer's idea. I made a paper template and drilled out a 22"x5-1/2" piece of wood, 1/2" thick. I used a 1/2" spade bit for the joystick lugs, a 1-1/4" hole saw for the buttons, and a 2" hole saw for the joystick itself. Pictures are better than words here:
The small rubbers were great; they hold the wood tight once the WICO joysticks are installed, and they leave just the right amount of room to install the dust cover under the CP:
I checked the clearance with a leaf switch I pulled from my Joust CP, and it was perfect. Unfortunately I forgot to order leaf switches to go with these buttons, so I won't be able to finish this today. 


There is one problem with my wood panel: the holes are too large to hold the PAL nuts. Fortunately the buttons are so tight they don't budge anyway, so this was a non-issue. If I did this again I'd drill a smaller hole, and just use a Forstner bit to cut a shallow hole to clear the button shoulders.

Tuesday, December 7, 2010

Multi-Williams Control Panel (part 1)

 Rustoleum Metal Primer

 Rustoleum Flat Black enamel

Cleaned with 70% iso alcohol

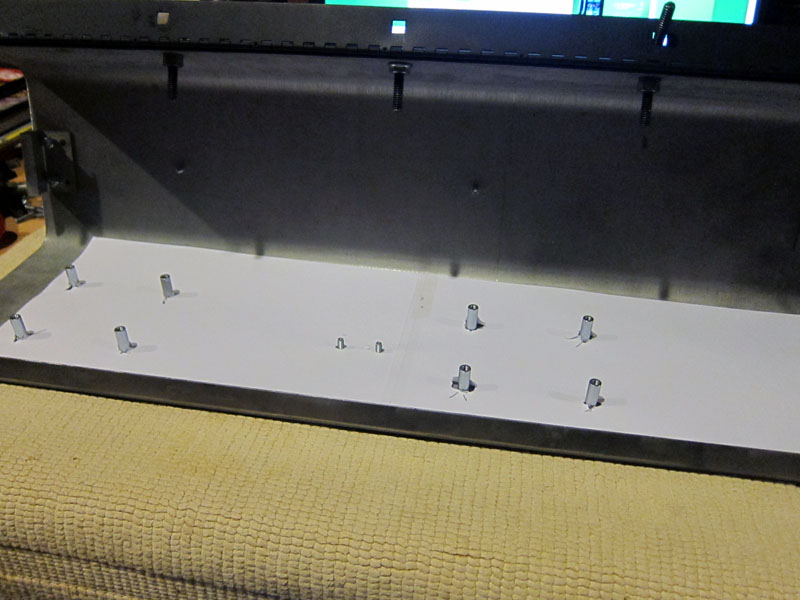
 Tip from fellow KLOV'er: position the top using a few buttons. 
This worked great! 

 Bottom is finished

 Time to remove the backing and do the top

 Overlay installation is done!

 I painted the hinge and bolts flat black. 
Some of these go to another game.

 The catches needed to be moved forward 3/4", to compensate for the reduced thickness of the control panel. 

 Hinge is installed. The square part of the carriage bolts didn't fit through the holes in the CP, so the bolts stick out a tiny bit.

Removing staples from the gasket that goes between the metal and the glass bezel. I used double-sided tape to attach the gasket to the control panel, worked fine. I need to buy some thin weatherseal to attach to the other side.

Installed. The reason that the right joystick isn't installed is that its top leaf switch butts up against the bezel holder. I'll need to cut out a notch in the bezel holder.

Close-up of the plastic gasket (reused from the old CP).

That's it for now. In part 2, I'll install the rest of the hardware and connect the JAMMA harness.

Monday, December 6, 2010

Dynamo CP: mystery game

What was this before it became a Maximum Force? Either someone went crazy with a metal punch, or this control panel has led at least 3 lives. I'll let the pictures tell the story...


It took my about an hour to get the old overlay off, using a heat gun. Lots of sharp edges, no blood - I'd call that a success.

[UPDATE] A fellow KLOV'er posted a link to this pic, which shows the original CP (on the right):

I counted, and there were 11 holes added. Having this original picture really helps me with my layout planning.

Sunday, December 5, 2010

Monitor Cleaning / Rejuvenation

I found some time to use my new B&K 467 CRT Restorer/Analyzer today. In fact, I did 5 monitors. The steps for setting it up and using it were really straightforward, and it was even easier for me because every monitor used the same CR23 adapter, and a 6.3V heater setting. I started with this tube:
This is from a monitor that stopped working after I did a cap kit on the chassis. The plastic insulator was burned and brittle, and literally fell apart when I pulled the neckboard off  to cap the chassis. When I initially hooked up the BK467, all three guns were in the red. This was one of two tubes that required the draconian REJUVENATE function. After rejuvenating all three guns,  readings were all midway into the green, and colors were tracking well! I was happy about this because the screen has almost no burn. It will make a nice monitor for someone.

Here's what the BK467 looks like when it's set up:


I think this is the best $90 I've spent on anything related to the hobby. It's already paid for itself with the one tube it brought back from the dead. 

Tips:
  1. Rejuvenation does reduce the life span of the CRT! So unless emission readings are in the red, use the CLEAN/BALANCE setting instead. 
  2. Rejuvenation can create a short! I experienced this with my Defender monitor. Fortunately the "REMOVE SHORTS" function fixed it (after about 4 presses). This was a little nerve-racking, but it all came out OK in the end.
  3. There's nothing wrong with a tracking error, if the gun that's low is still in the yellow! This can be fixed by adjusting the OFFSET/DRIVE settings for that color on the neckboard.
In summary: "Better" is the enemy of "Good". The CLEAN/BALANCE function is as safe as vitamin C, but think twice before using REJUVENATE. 

Dynamo cab part 2 - Bondo

I spent some more time on my Dynamo HS5 cabinet recently. After protecting the newly laminated back with some masking tape and craft paper, I glued and screwed it into place:


I counter-sunk the wood screws, but one of the nice things about Formica (especially the thicker "grade 10" version) is that it hides everything. I don't think I'll be using Gorilla Glue anymore, though. It oozes and foams out all over the place. 

The front of the cab had a chunk out of it, so I had to use Bondo to fill it. I've used it on my house before (to replace some rotten wood), and it works great. The trick is to build it up, for deeper holes. I built a dam, with Saran Wrap to minimize sticking:


After sanding, I've got a nice 90 degree edge. It's a bit rough, but only about 1/2" will be showing. The rest will be covered by the front panel and T-molding.


I routed out the groove for the T-molding with my dremel, using a cutoff disc: 


Although I wore a dust mask for most of the work, I didn't when I used the Dremel. I inhaled some of the dust from the air, and immediately regretted it. I think I'm still feeling it in my lungs now, 2 weeks later.

Anyway, the repair came out well. I still need to paint the interior, but here's a picture after a quick coat of spray paint:


I'm pretty happy with how everything is looking. I just need to glue/screw the front panel in place and Formica the 2 sides, and then I'll be done with the woodworking.

Saturday, December 4, 2010

Multi-Williams

I've started converting my Joust to a Multi-Williams. I've got my JROK board wired up, and my new control panel with a Phoenix Arcade overlay came in the mail today:


I have a spare set, so PM me on KLOV (jschlarb) if you need them.

Wiring the cabinet would have been much simpler if I had not ordered the cheapest possible JAMMA harness. The first thing I did was replace the crappy monitor connector:

Original connector (which didn't even fit)
Replaced with Trifurcon-pinned connector

The JAMMA harness wasn't keyed at all, which is dangerous. If you plug the board in backwards, you risk frying it. I labeled the connector and added a key:


The JROK board is really amazing. I have a spare one, but I'm saving it in case my Defender boards crap out. you can select a single game on the JROK, so it's a perfect after-market replacement for these games.

I like to keep games as original as possible, so I'm keeping the original Joust boards. In fact I realized that I could just tap the voltages for the JROK from the original PSB. I made a special connector for this:   


This wasn't easy; I had to whittle down the insulation to get it to fit in the second crimp of the trifurcon connector pins. I'll replace the large capacitor on the PSB. By the way, only +5V and ground are needed for the JROK board.

HUGE thanks to Darin Jacobs, JimFly, RikiTiki and JROK for making this project possible.